Total Pageviews

Friday, July 22, 2011

Rain is a good thing

There seems to be a common theme between some blogs in that when it rains, work gets done in layout rooms.

I, not wanting to be out done have ventured into the train room due to it poring outside. Having plenty of jobs started that needed completing I decided that I needed to start the facia.

It has been a long time since undertaking this (on other peoples layouts) and having given it a lot of thought I jumped in.

When first designing "The Branch", a flowing facia following the track was always a requirement. So in this early stage I set about acquiring masonite for when the big day arrived.


Using some strips of 3mm mdf to form the curve

As you can see in the photo above I needed to trim the joists back so the facia could be afixed. The mdf allowed me to map the curve, mark and then cut for the facia to be fixed. That was the easy part.


with the joists cut back and the supports in place

Now is where it starts to get tricky. I wanted the facia to allow for creeks cuttings and hills all in one piece. Hmmm how much masonite do I allow above and below the track to cater for said scenery features. I settled on a mean average of 200mm and it seems pretty good.


facia inplace and ready to be cut to the required contour

Holding the facia in place while you start to fix it to joists is really the tricky part. After fixing it is time to cut the profiles with the trusty jigsaw.


To allow for a scenic break between the backdrop, there is a road overbridge and the facia has to be cut high. In the shot below you can see the bridge loosly in place to mark the cut height.


road bridge indicates the height to cut the facia


Once you get into a pattern of marking the joists, attaching the facia support and then attaching the facia and contouring it, you start to see the end results quicker and this spures you on.


The last photo gives you an indication of how the land forms around the track. All that is left is to fill in the area with coolite foam and shape.


the finished product


The weather has fined up again and it is time to get outside and finish of the horse stable, fencing, clearing ......................

Monday, July 18, 2011

Behind the Scene "Toowoomba 2011"

Yes the event has gone but the smiles are still hanging on. Geoff and I never travel light when it comes to Toowoomba, bringing everything bar the kitchen sink.

We camp at the show venue and this means we set up for just as much fun when the show closes.


Some of the gear that travels with us


Friday evening after the supplied exhibitor meals are over it is time to enjoy some modelling and idea sharing. There is always plenty taken to do but only a small amount gets done.


The smile says it all


When the show closes it gives exhibitors the chance to take some photos. We had some fun with the various locos that graced "Splitters Swamp Creek" over the weekend.


My 32 left Wattle Flat for a spin on Splitters'


We were joined over the weekend by fellow Tuesday Nighter Brendan and some of his nicely detailed rolling stock.

The 19 and CPH are the work of Brendan with my 32


Toowoomba is over for another year with Splitters and Geoff having been exceptionally well received for a first time outing. There were many very inspiring comments and Geoff should be very proud of his acheivements.


Many thanks to Brendan for becoming part of the team, great company with plenty of laughs and to Geoff for the great mate he is. I look forward to our next adventure.

Sunday, April 3, 2011

The outdoor calls

G'day all and hasn't time flown. The Saturday session of the Tuesday Nighters has long since gone and in that time nothing new has happened with the "Branch".

Some of the Tuesday Nighters L to R. Geoff, Craig, Mike, Shelton, Brendan and Peter


All ran well with the fellas only finding one problem and that was with the Shino curved turnout I used causing shorts when being thrown. I think by removing the contact strip under the blades will fix this.


The pictures are nothing new for the Tuesday nighters however they show fellow bloggers my progress to date.


Mapping out the curved turnouts


Having laid this area using large radius curve turnouts at either end and finished the wire in tube control system for the mainline turnouts and tested it, I am not completely satisified with the look or feel of it. I will leave and continue on with the branch pending further research.


In the mean time trains are running from this station to Wattle Flat.


3230 departing the loop for Wattle Flat. Goods to left and Main to right


Here is a shot of the modified Shino turnout with the brass contact removed


The removal of the brass contact strip from the turnout has fixed the problem totally.


3230 testing the modified turnout and track work


With all trackwork in place and tested it was time to move on with more benchwork and roadbed construction.


Hmmmm must play that guitar again.


Well that is about all from me. Now that the winter weather is upon us the outdoor calls and all those jobs that get put off in summer need to be done.

Monday, March 7, 2011

Tuesday Nighters are comin.....

Years ago, I used to work in an office and totally hated deadlines, preferring to do all that could be done that day an never where possible leave it for tomorrow.

It is funny however that in our personal lives we sometimes strive for a deadline just so we can get something done!!! Well I feel that I have been making reasonable progress on the layout however the Tuesday Nighters have made small hints that they would like to come and drink some beer and have a real look at the "Extension".

Yes to some people I do live out in the sticks and at times I need to offer meal vouchers and fuel cards for people to come over Ha Ha, so the other evening I offered for those interested to attend my place on the the 26th March for a Saturday afternoon version of the Tuesday Nighters and this means I better get something running I was told!!

Here is an overview of "Wattle Flat" all the trackwork, wiring and turnout activation is complete


Being a little Anal Retentive, alright alot, I wanted to completely test this trackwork to ensure all was up to standard. There are to be no stalling engines.

Another overview with 3230 and 4912 shunting and operating through the various turnouts, trackwork has also started on the fuel siding


Here is a close up of the fuel siding being shunted. I am not entirely happy with this arrangement and may remove the turnout from its current location and place it at the other end. This siding will be shunted by the shunt crew out of "Wattle Flat" and not trains running between stations. I need to do more research on the prototype.
This is the very first train shunting the siding.


All track in place with various 'placed' sidings


The curve in place and 3230 ensuring no track problems


With that side of the layout up and running with no problems and ready for the Tuesday Nighters to find some I thought I should move around the corner and make some progress so that the trains have somewhere to go.
The formwork taking place.


I wanted to take full advantage of the sweeping curve on approach to the yard so I used large radius turnouts in the planning and so far seem to be working. This process of raising the track above the benchwork on risers takes a heap of planning, not to mention screws but will be worth it when scenery time comes.
3 roads. Main, loop and goods road plus a siding into a small quarry, ballast works (more shunting)

Well that is the progress so far. I am wanting to operate the new station via the wire in tube system with Frame A in the station area controlling main line turnouts, Home signals and Starters, 10 levers in all.
If any fellow bloggers are going to be in the area on that day drop me a line, you will be most welcome.
Anyway until next time.

Monday, February 7, 2011

Making Prog.....Tracks

Progress on the branch has slowed some what with the need to maintain the property that the train room resides on. I could go into all the great fun stuff I have been doing instead but........

Anyway, having completed the curve leading into "Wattle Flat" and done all the testing, I felt it was time to work on the rest of the station area.

The joy I mentioned in earlier blogs of prewiring the turnouts makes for a little more effort when installing each one as all the holes for the wires and activation need to done at the same time. This sounds easy with one but when you are trying for a few as in the shot below it takes a bit of patience.

You have probably heard it before "...don't need to lay the track pefectly as the prototype was all over the place". Well I am sorry to say that if it ain't spot on then it ain't gonna happen!!

One of my test methods is to push a string of s trucks and bogie wagons through the turnouts as fast as I can and if they stay on they pass the first test. Trains will never run fast on the branch, it is just a method I found that works.
The 44class is at the end of the line.


I have always worked in code 100, however this time I am working in code 75. The switch has been worth it. I would love to have hand laid everything, but I only have so many modeling hours. Having hand laid a siding on my exhibition layout, I knew the work involved.
All the turnouts have been DCC modified and installed with the wire activation. I have then tested by running various sound equipped locos through this area checking for faults and dead spots and am pleased to advise all is spot on.
Tracks from left to right at the bottom of the photo,
Coal platform, turntable, single stall shed and head shunt.


Probably the most boring photo and job of them all is the wiring. The bus running between two moduules with the turnout wiring and track feeds yet to be installed. The layout sits on the black inch by inch steel frame and everything can be unbolted should I have to move!!!!!!!!!
That's where all those screws went!!! Metric timber here 70 x 19 frame with 42 x 19 risers, simple.


The curve heading away from the terminus has now got the track laid. I will try and bank the curve and also remove alot of the sleepers to give the track a more branchline effect. I have tried it in another area and it looks great.
I'll send them back to Peco so they can reuse them, enough said.
The rail is soldered together and then bent around the curve. My joints are then stagered and there are no kinks.


Although slow, I am making progress and with the Tuesday nighters keen to head on round for a look I need to have a complete train running asap.
Happy modeling.

Sunday, January 9, 2011

More rain means more modelling!!!!

With all this rain there has been a need to go out to the train room and let the "Good Wife" and daughter deal with there own cabin fever!!!!!!!!!

After the last post I thought it was time to see if the turnout idea works in practice and not just theory.
With my 5 amp radio system in for repair I hooked up the Powercab and did a run by.

My sound equipped 32 and a small spring run back and forth.


With all having performed well I thought it best that when my 5 amp system returns I have things ready for the installation.
I have commenced RJ12 cable construction and have made a few testing panels to ensure everything is wired correctly.
Newly pruchased crimping tool and associated testing board

I then researched various sites and people concerning the finer side of the electrics. I felt I needed an Amp meter for checking the layouts load and also a volt meter for just in case.
I then wanted to break up the comms bus and the track bus, so with all that in mind I constructed a box to house it all.
I am of a firm beleaver that why all the wiring I do now is clear in my mind, that will not be the case in 10 years time if I have to trouble shoot. Everything has been labled and colour coded.
Now I just hope the layout will make it to 10!!
My black box sits on the top of the Power cab. Hmmm must put that filter on the power leads.

All has been set up, tested and working as it should. I now need to lay some more track so as to get a better run.

Happy modelling.

Darren


Sunday, December 19, 2010

On a curve with a Bonus

Well I guess it is no news to anyone on the east coast of Australia that it has been raining. The bonus has been that it is also raining on the weekends and this means more modelling time in the shed.

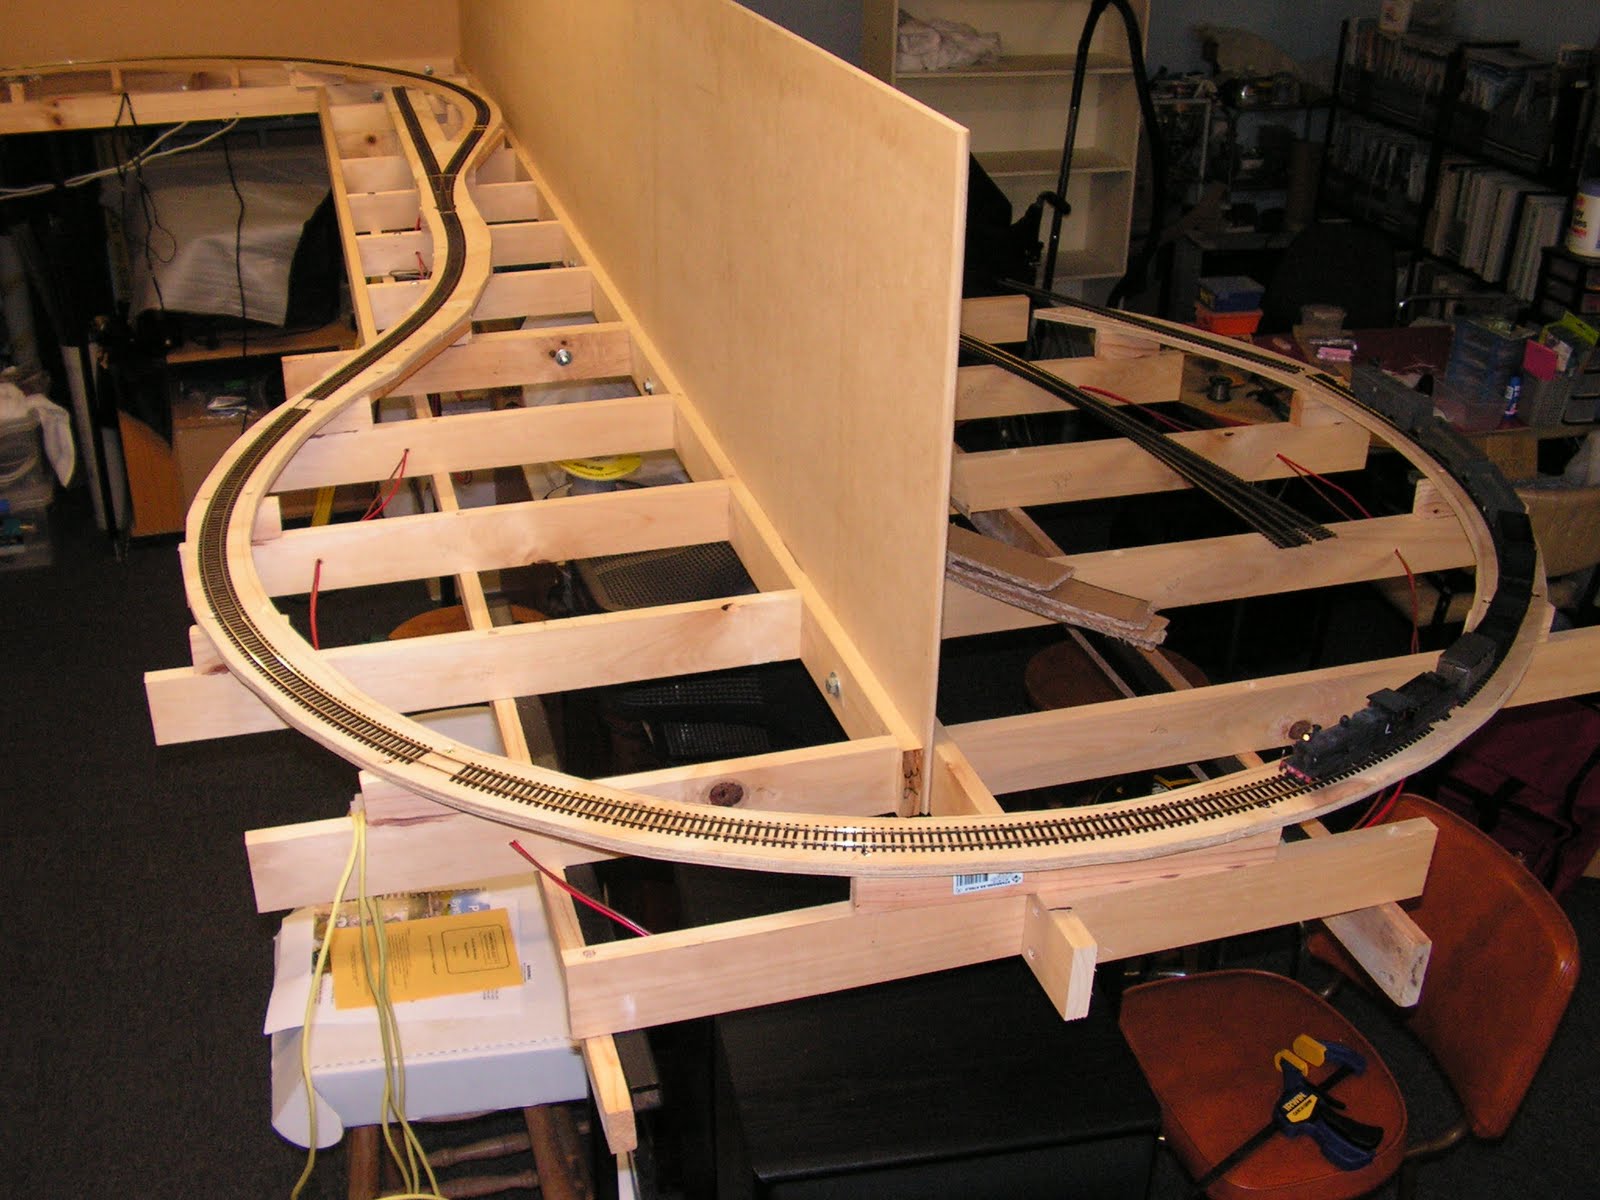
With the first phase of the benchwork complete it was time to move on to the roadbed. I like to cut the plywood out for the trackwork area only so as to allow low level scenery. The more the better.

When cutting the curves, I like to use large sheets of cardboard as templates and then trace it directly on to the plywood.
When you cut out the full curve it makes for a stronger roadbed and a smoother surface. All the better for laying track!!!!!! I can't wait.


This shot shows the cardboard template, and the plywood roadbed sitting in place ready to add the risers.


An overhead view with the risers all cut and screwed and glued in place, ready to lay track!!!


After each major project I like to clean up and then set about marking everything out for a test fit and general feel. I then leave it for a day for two and then revisit it.
From previous posts you will have noticed that "Wattle Flat" has been done for some time, but over the months no track was layed!!. This was mainly due to making sure I could get the largest curve possible without losing much needed yard space.

Having worked with my cardboard templates I finally got the largest curve possible and as seen from the shots above, all installed.


Curve point installed with activation mech and wired


Under roadbed shot
As seen in earlier reports, I took the time to prewire all the turnouts and make under roadbed wiring harnesses. This took a lot of time during the installation of the turnout as all holes for the wiring and the activation have to be drilled prior to turnout installation. Hiding all the wiring is something I consider important.
Hmmm, I guess after I have installed a few there might be some time savings, when it is time for the wiring. I can't run a train through, until it is installed properly as the frogs have been isolated and require the activation mech to align the power!! There is always a negative to a positive.

Well enough of my ramblings!
I wish all bloggers and followers alike a very Merry Christmas and a safe and prosperous 2011.